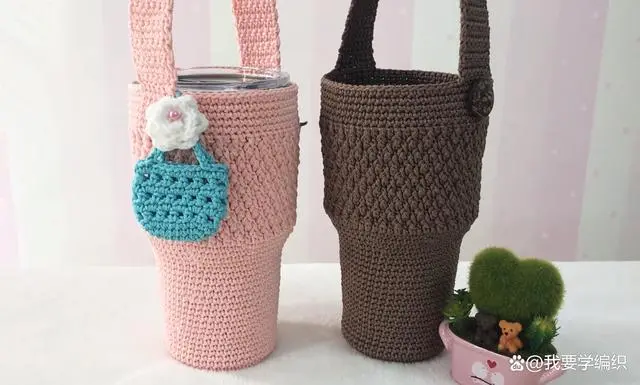
The water cup cover is also a very practical tool for many people, especially those who like to make their own health tea and only drink from the cup at home when going out. Depending on the cup type, there are various styles of water cup sleeves, including straight type, extended type, etc. Today we are learning how to hook a water cup cover that is suitable for small bottoms and large mouths. Demonstration thread: hollow cotton (other threads such as flat ribbon thread, ice silk thread, etc. are acceptable).
Because the sizes of cups will be different, the process I am explaining is mainly to let everyone learn the specific principles and apply them flexibly. We start from the bottom of the loop, first round: loop, hook 8 short stitches in the loop (not pulling out, loop hook, add a mark button on the first stitch of each round); second round: hook each stitch 2 short, 16 stitches in total; Round 3: Add 1 stitch every other stitch, 24 stitches in total; Round 4: Add 1 stitch every 2 stitches, 32 stitches in total; Round 5: Add 1 stitch every 3 stitches, 40 in total Needle; Round 6: Add 1 stitch every 5 stitches, a total of 48 stitches. In this way, hook it until it fits the size of the bottom of the cup.
Regarding hooking the bottom of the cup, everyone can flexibly adjust it by themselves. First, look at the size of the bottom of the cup. Second, look at the crochet pattern part of the cup body and the number of stitches required for the pattern. Then we go back to design the cup. At the bottom, what kind of stitch number looks like? After adding stitches later, it can be the number of stitches suitable for the pattern. Then we return to the tutorial. After the bottom size is suitable, we hook up a section without adding or subtracting. At the wider area, we need to add needles again. Then we hook a section without adding or subtracting, and then add stitches at the widened area. No more hooks are added or subtracted, and so on.
When we crochet, we can put the cup in while crocheting to compare whether the size is suitable. In addition, when we add needles, we must calculate the number of stitches. The total number of stitches after adding must fit the number of stitches of the pattern. The cup pattern part like this one only requires an even number of stitches, so it’s easy to do. Friendly tip: To add short stitches, we can crochet 2 short stitches in 1 stitch, but if you think the hook gap will be larger and unsightly, you can first pick the second half stitch and crochet 1 short stitch, and then Pick a braid needle and crochet 1 short stitch. After the lower part of the cup is hooked, we pull out the first stitch in the last round, and then enter the pattern part of the upper part of the cup.
Then directly crochet the strap, first hook 7 short stitches, then turn it back and forth and hook 7 short stitches until the required length is reached, then break the thread and leave the thread end (note: you can also hook it into other rope strap styles ). Then insert the thread end into the sewing needle, and roll the 7 needles corresponding to the other side, one needle at a time. Finally, you can hook some small decorations and hang them on it, which will look nice and cute. Okay, this water cup cover is finished. If you encounter this type of cup with a small bottom and a large mouth in the future, you can design it yourself~!
Post time: Nov-02-2023